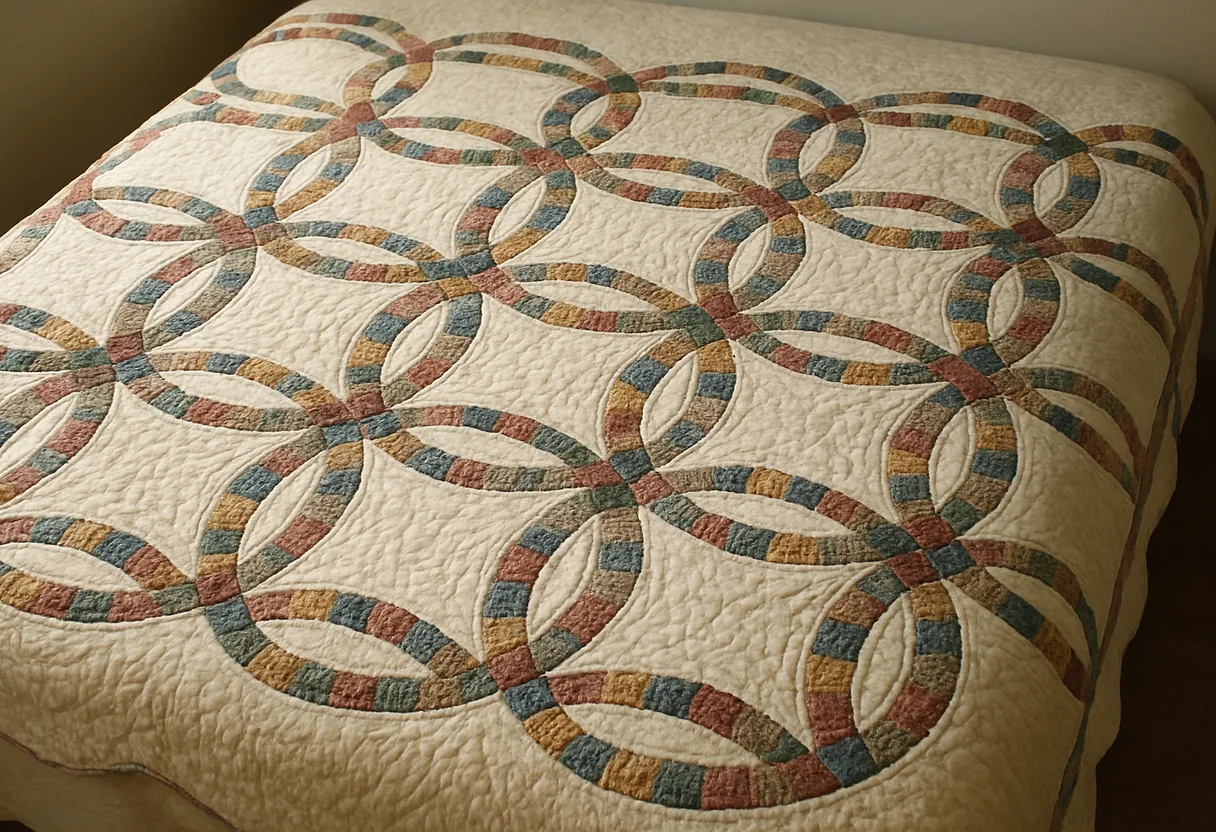
Anatomy of the ring
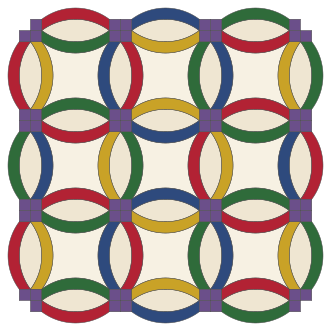
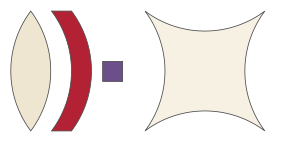
| Piece | What it is | In our 10-inch layout |
|---|---|---|
| Melon | The pointed oval of background where two rings overlap | 7½ in tip to tip, 2½ in wide (finished) |
| Arc | The curved band along each side of a melon. Traditionally pieced from small wedges; one piece in modern versions. | 1¼ in wide, 7½ in end to end |
| Square | The small square where the arcs of neighboring rings cross | 1¼ in finished (cut 1¾) |
| Center | The background inside each ring, with four inward-curving sides | Corners 7½ in apart, 5 in across the middle |
Each melon's long sides are arcs of circles centered on the two rings it sits between, so every melon is the overlap of two rings. Each arc is the band between a melon side and the same curve moved 1¼ inches outward; that moved curve is the side of the center next to it. At every point where four melon tips meet, four squares make a little four-patch, and two rings pass through it diagonally, which is what makes the rings look interlocked.
The pattern turns up again and again in collections from the 1930s; the International Quilt Museum, for instance, holds a Double Wedding Ring made of feedsack cotton, dated 1930 to 1940. Scrappy arcs were a way to use every last scrap.
Why it's hard
- Every seam is curved, and half of them sew a concave edge to a convex one. Curved seams stretch if you pull them.
- The sides of melons and centers are cut partly on the bias, so they stretch while you handle them.
- The numbers add up fast: a 55 × 65-inch quilt has 142 arcs, and 568 wedges if the arcs are pieced.
- Small errors don't stay small. If each arc runs ⅛ inch long, the squares stop meeting at the junctions.
- The edge is scalloped, so the binding has to be cut on the bias.
None of that needs special skill, only patience and accurate templates. Solid one-piece arcs remove most of the piecing, and pinning at the notches handles the curves.
Free templates: rings every 10 inches
These templates are our own, drawn from the geometry above. Rings sit on a 10-inch grid, so a quilt N rings wide is (N − 1) × 10 + 15 inches across the outer scallops. Every template includes a ¼-inch seam allowance (cut on the dashed line, sew on the solid line). The center prints as a half, to place on a fold of fabric, because the whole piece is wider than a Letter page. Short ticks mark the middle of each curved side: match them when you pin.
Turn on JavaScript to draw the templates. The finished sizes are in the table above.
Print at 100% and measure the 1-inch square on every page. Trace the templates onto template plastic: you'll trace each one dozens of times. For other curved shapes, such as drunkard's path, orange peel and clamshells, use our curved template generator.
How many pieces
| Rings (across × down) | Finished size | Centers | Melons | Arcs | Squares |
|---|---|---|---|---|---|
| 3 × 3 (wall or baby) | 35 × 35 in | 9 | 24 | 48 | 60 |
| 4 × 5 (lap) | 45 × 55 in | 20 | 49 | 98 | 116 |
| 5 × 6 (throw) | 55 × 65 in | 30 | 71 | 142 | 164 |
| 6 × 7 (twin topper) | 65 × 75 in | 42 | 97 | 194 | 220 |
Sizes are measured across the outer scallops. For a quilt N rings across and M down: N × M centers; (N + 1)M upright melons (between side-by-side rings and down both sides) and N(M + 1) lying-down melons (between stacked rings and along the top and bottom); two arcs per melon; and squares: every upright melon gets one at both ends of both arcs, and each melon along the top and bottom edges gets one at both ends of its outer arc, which makes 4(N + 1)M + 4N. All counts are checked by calculation.
For the 5 × 6 throw, using 40 usable inches of fabric width: about 3¼ yards of background (eight 8¼-inch strips for the centers, four to a strip, and six 8-inch strips for the melons, 13 to a strip); about 1⅞ yards of arc fabrics in total (about 20 arcs fit across an 8-inch strip when they're nested); and ½ yard for the squares (eight 1¾-inch strips). Pieced arcs need a little more, for the extra seams. Add backing and bias binding.
Assembly order
Melons come in two orientations: upright ones between side-by-side rings, and lying-down ones between rings above and below each other. The order below sews the curves first and leaves only short straight seams at the squares.
- Make the arcs. For pieced arcs, sew four wedges together, the two middle wedges in the center and an end wedge at each end, with the mirror-image pairs facing each other. Press the seams one way.
- Upright melon units: sew an arc to each long side of an upright melon, matching the center ticks and then the ends. Then sew a square to both ends of both arcs.
- Lying-down melon units: sew an arc to each long side of a lying-down melon. For the melons along the top and bottom edges, sew a square to both ends of the outer arc.
- Columns: sew each column of centers together with the lying-down melon units between them, plus one at the top and one at the bottom. These are curved seams between a melon unit's arc and a center's side.
- Sew the upright melon units end to end into long strips, square to square, one strip per gap between columns plus one for each outer side.
- Join the columns and upright strips. Each long seam alternates: a curve where an arc meets a center, then a short straight run where the squares meet the ends of the lying-down melon units. Pin at every square first, then at every center tick.
- Press, quilt, then bind the scalloped edge with bias binding as described in binding variations.
Sewing the curves
Put the concave piece (the one curving inward) on top. Pin the centers, then the ends, then ease the rest between the pins, which you can do because the bias edge gives a little. Sew slowly with a ¼-inch seam, stopping every inch or so with the needle down to straighten the next bit of the top edge. Don't clip the seam allowance unless it won't lie flat. Press toward the arcs.
Common problems
| Problem | Cause | Fix |
|---|---|---|
| Squares don't meet at the junctions | Arcs too long or too short | Check each arc against its template before sewing it on; trim or resew the wedge seams |
| Puckers along the curves | Curve sewn without enough pins, or pulled | Pin the center, ends and halfway points; sew slowly with the concave piece on top |
| Rings look wavy | Bias edges stretched when pressing | Press with an up-and-down motion, not by sliding the iron; starch the fabric before cutting |
| Points of the centers cut off | Seam wider than ¼ inch at the points | Push a pin through the point on both layers and sew an exact ¼ inch there |
| Scalloped edge ripples | Binding cut on the straight grain, or stretched | Use bias binding and ease it around the outer curves |
As a wedding or anniversary gift, sign it with a quilt label, or gather wishes from guests on the background melons as a signature quilt. For a gentler first try at curves, the Dresden plate has only one curved seam per plate.
You might also like
 Cathedral window quiltThe folded block step by step, with a size chart, the window math and a 17-inch pillow worked out.
 Bear's paw quilt blockFour paws of 16 triangle claws around a sashing cross, cut for 7, 10½ and 14 inch blocks.
 Jacob's ladder quilt blockFive four-patches and four triangle squares that link into diagonal ladders, cut for 6, 9 and 12 inch blocks.
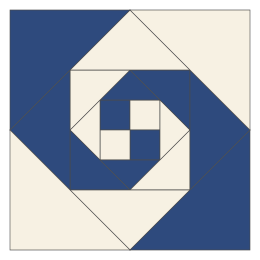 Snail's trail quilt blockA four-patch and four rounds of two-color triangles that spiral out, cut for 8, 12 and 16 inch blocks.