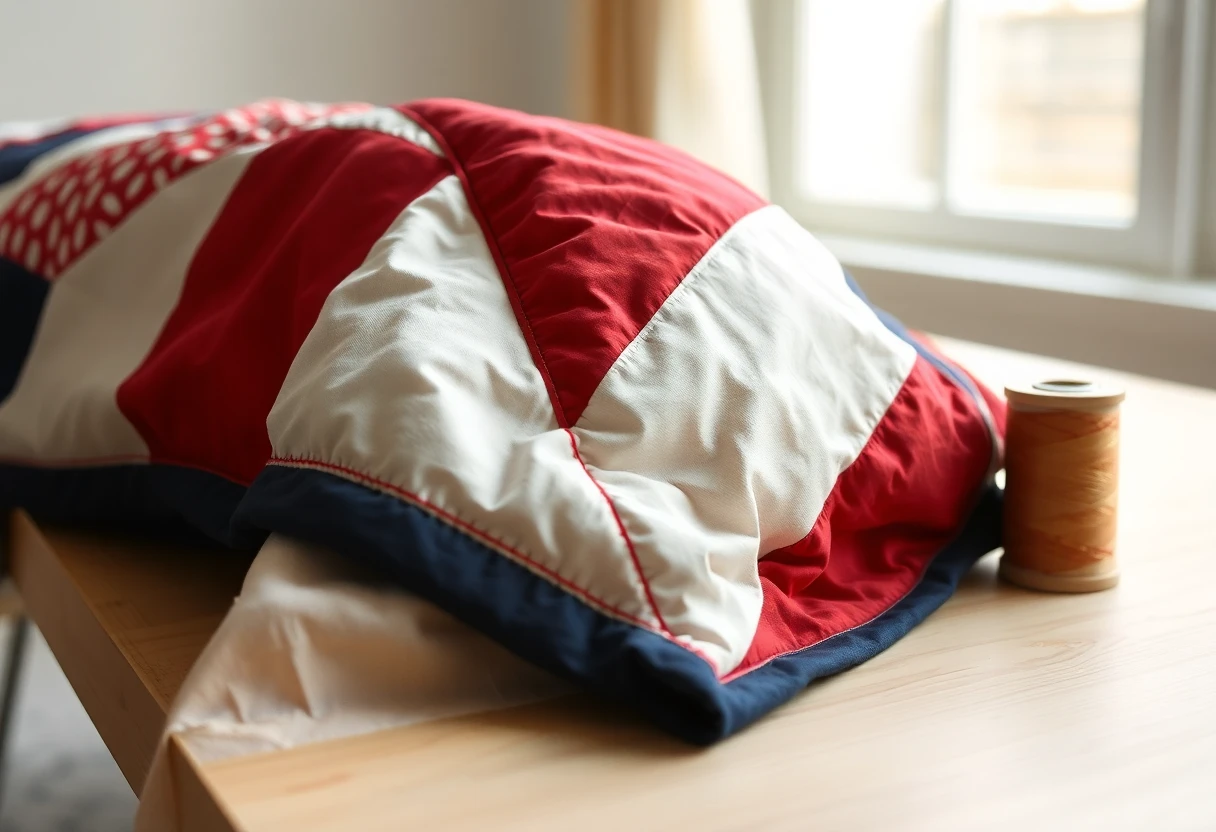

Which edge to choose
| Edge | Look | Sewn | Good on |
|---|---|---|---|
| Flange (faux piping) | ⅛-inch line of a second color | All by machine | Bed and lap quilts that need a little accent |
| Piped | A raised, rounded cord | Machine, then binding as usual | Wall quilts, pillows, show pieces |
| Machine front-to-back | Plain binding with topstitching | All by machine | Baby, picnic and charity quilts that get washed often |
| Bias binding | Plain binding that bends | Machine, then hand or machine | Rounded corners, curves and scallops |
| Prairie points | A row of folded triangles | Machine and hand | Country and patriotic quilts, table runners |
| Facing | No visible binding | Machine and hand | Art quilts and modern quilts where the design runs to the edge |
Flange binding (faux piping)
Two strips of different colors are sewn together lengthwise, folded, and sewn on so a thin band of the second color shows next to the quilt. It is sewn entirely by machine.
- Cut main binding strips 1½ inches wide and flange strips 1¾ inches wide, enough of each to go around the quilt plus about 12 inches. Join each color into one long strip.
- Sew the two long strips together along one long edge with a ¼-inch seam. Press the seam toward the main color.
- Fold the strip in half lengthwise, wrong sides together, raw edges matching. The joined strip is 2¾ inches wide, so it folds to 1⅜ inches, and the fold falls ⅛ inch past the seam: that's the flange. Press.
- Lay it on the back of the quilt with the side that shows only the flange color facing you, raw edges matching the quilt's edge. Sew with a ¼-inch seam, mitering the corners as for ordinary binding.
- Wrap it to the front. The main color now shows, with the flange next to the quilt. Stitch in the ditch between the main color and the flange, using thread that matches the flange, with clips holding the binding as you go.
Measure the flange on a short test piece before you make the whole length. If your seam runs a little wide, the flange shrinks; widen the flange strip by ⅛ inch to get it back.
Machine binding, front to back
Machine binding is quicker than hand finishing and stands up better to frequent washing. The basic steps are in the main binding guide; these details make it look tidy.
- Cut strips 2¼ inches wide rather than 2½. The narrower strip wraps snugly, so the topstitching catches it evenly.
- Sew the binding to the back with a ¼-inch seam, wrap it to the front so its fold just covers the first stitching line, and topstitch ⅛ inch from the fold. A walking foot keeps the layers from shifting.
- Hold the binding with clips, or set it first with a thin line of washable glue stick and a dry iron. Pins pulled out at speed are how binding ends up wavy.
- At corners, fold the miter into place on the front, sew to the fold, stop with the needle down, pivot and continue. A dab of glue under the miter keeps it from sliding.
- Match the top thread to the binding and the bobbin thread to the backing. The stitching on the back lands on the backing just past the binding, so a matching bobbin hides it.
Piped binding
Real piping is a cord wrapped in a bias strip. It sits between the quilt and the binding as a raised line.
- Cut bias strips 1¼ inches wide and join them into one strip. Wrap it around a thin cotton cord (about ⅛ inch across), right side out, and baste close to the cord with a zipper foot.
- Trim the piping's seam allowance to ¼ inch. Sew it to the front of the quilt, raw edges matching the quilt edge, with the zipper foot right against the cord.
- At each corner, clip the piping's allowance almost to the stitching so it turns, and round the corner a little: a sharp 90-degree turn in a cord puckers.
- Where the ends meet, open the bias, cut the cord so the ends butt, fold one end of the bias under and overlap it.
- Sew double-fold binding on over the piping, stitching just inside the piping stitches so they don't show. Turn the binding to the back and finish by hand.
Curves and scallops: bias binding

Strips cut across the grain barely stretch, so they pleat on a curve. Strips cut at 45 degrees (on the bias) stretch enough to lie flat around rounded corners and scallops. Cut them 2¼ inches wide for double-fold.
- Mark the scallops on the quilt after quilting, but don't cut them yet. Sewing the binding on the marked line first keeps the bias edge of the quilt from stretching.
- Sew the binding along the line with a ¼-inch seam. Ease it around the outer curves without pulling; stretching it there makes the edge cup.
- At each inside point, stop with the needle down exactly at the point, lift the foot, pivot, and straighten the quilt edge behind the needle so the binding folds into a small pleat. Continue.
- Trim the quilt on the marked line, clip into each valley almost to the stitching, and turn the binding to the back. At each valley the binding folds into a neat V; take a stitch there to hold it.
A curved edge is longer than a straight one. A half-circle scallop is about 1.57 times its width (π ÷ 2), so a 64-inch side cut into eight 8-inch half-circle scallops needs about 100½ inches of binding instead of 64. Shallower scallops need less. For continuous bias, a square of fabric S inches on a side gives about S² ÷ strip width inches of strip: a 30-inch square cut into 2¼-inch bias strips gives about 400 inches, before the seams. StitchTested's binding calculator handles straight edges.
Prairie points
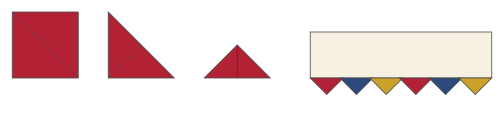
A square folded twice on the diagonal makes a triangle as wide as the square and half as tall, with the raw edges along its long side. A 4-inch square makes a point 4 inches wide; after a ¼-inch seam, about 1¾ inches of it shows.
| Square | Point width | Point showing | Points per 40 in, side by side | Points per 40 in, tucked half into each other |
|---|---|---|---|---|
| 3 in | 3 in | 1¼ in | 13 | 25 |
| 4 in | 4 in | 1¾ in | 10 | 19 |
| 5 in | 5 in | 2¼ in | 8 | 15 |
Tucked points are spaced half a square apart, so a side of length L takes 2L ÷ S − 1 of them; adjust the overlap a little to make the count come out even.
- Quilt the top, stopping about 1 inch from the edges. Trim the batting ¼ inch inside the edge of the top, and fold the backing out of the way.
- Lay the points on the front, raw edges matching the edge of the top and the points facing in. Pin or baste them with a scant ¼-inch seam. Ends of each row stop ¼ inch from the corner.
- Sew with a ¼-inch seam through the top and points only. Turn the points out so they stand past the edge and press the seam toward the quilt.
- Fold the backing's edge under so it covers the seam on the back and hand-stitch it to the points. Finish the quilting near the edge.
Facing instead of binding

- Square up the quilt. Cut four facing strips 2½ inches wide: two as long as the sides and two as long as the top and bottom. Fold each in half lengthwise, wrong sides together, and press.
- Sew the side facings to the front of the quilt, raw edges matching, with a ¼-inch seam. Sew the top and bottom facings over them, overlapping the corners.
- Trim the corners at an angle to reduce bulk. Understitch: press the seam allowance toward the facing and stitch through the facing and the allowance close to the seam. This makes the facing roll to the back.
- Turn the facing to the back, push the corners out with a point turner, and press so the quilt edge rolls ⅛ inch to the back. Hand-stitch the facing's fold to the backing.
A faced quilt loses about ¼ inch on each side to the seam, so plan the top a little bigger. For hanging a faced quilt, sew a sleeve into the top facing; see how to hang a quilt. Whatever the edge, square up the quilt first and label it once it's done.
You might also like
 How to bind a quiltDouble-fold binding from cutting strips to mitered corners and an invisible join.
 Straight-line machine quilting with a walking footQuilting parallel lines, crosshatching and matchstick lines on a home machine with a walking foot.
 Free-motion quilting for beginnersMachine setup, practice sandwiches and three first motifs, including the meander or stipple.
 How to square up a quiltTrimming blocks to exact size, squaring the quilted quilt before binding, and fixing wavy borders.