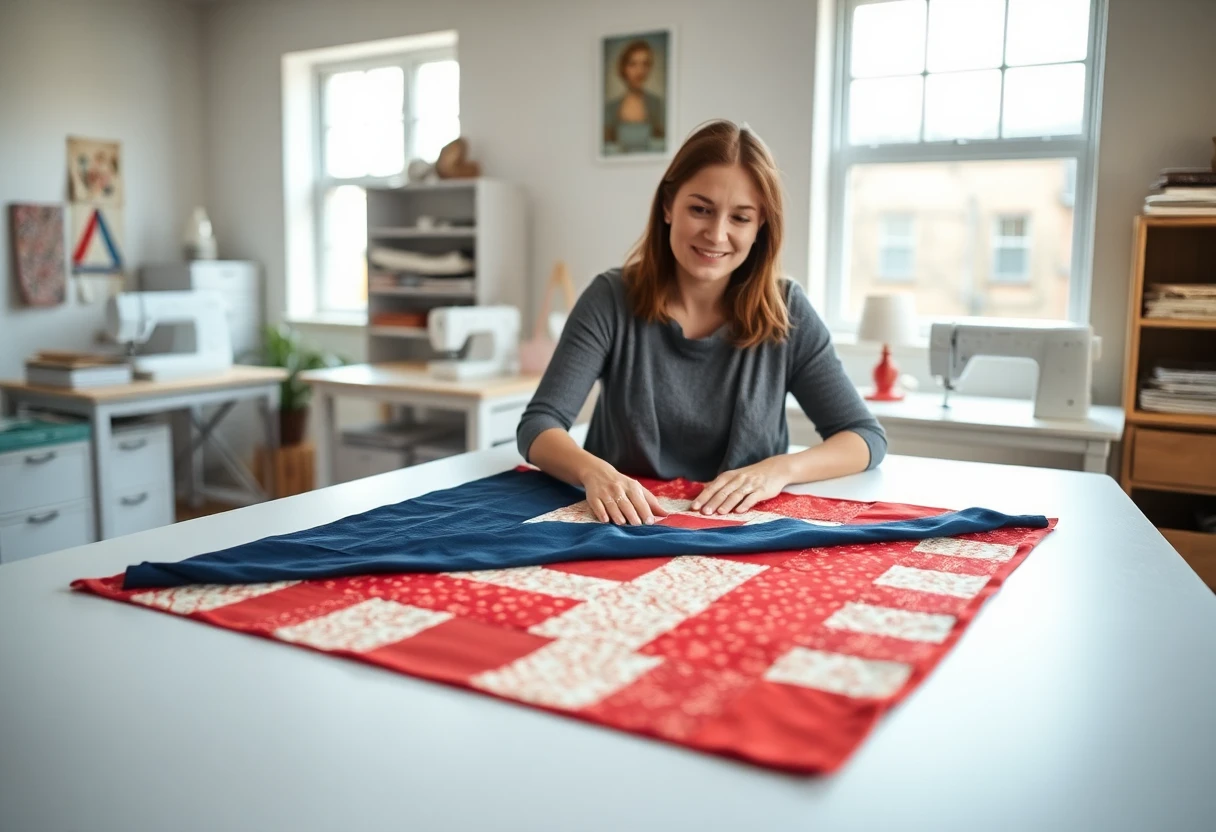
Why you measure through the center
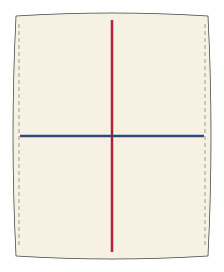
The outer edges of a pieced top stretch while you sew and press it, especially if they have bias edges or many seams ending there. The center hasn't been handled as much and is closer to the size the pattern intended. If you measure along an edge and cut the border to match, you sew the stretch in permanently, and the border ripples. Cut the border to the center measurement instead, and the border pulls the edge back to the true size.
- Lay the top flat on the floor or a big table without pulling it.
- Measure the length down the vertical center, from raw edge to raw edge. Also measure about 4 inches in from each side as a check.
- If the three measurements are close, use the center number. If an edge is much longer, that edge has stretched; it will need careful easing, and pressing with a little steam before the border goes on helps.
A metal or fiberglass tape measure is more trustworthy for long distances than a cloth tape, which stretches over time. Or lay two long rulers end to end.
Butted or mitered corners
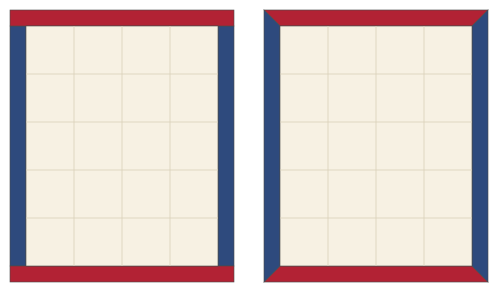
Butted borders are faster, use less fabric, and suit most quilts. Mitered corners take more time and more fabric, but they let a stripe, a printed border design or several borders sewn together turn the corner without a break, the way a picture frame does. If your border fabric is a plain or a small all-over print, butt it.
Worked example
A pieced top measures 48½ × 60½ inches through the center (that's 48 × 60 finished). We'll add a 4-inch finished border, so the strips are cut 4½ inches wide. The finished quilt will be 56 × 68 inches. All numbers are checked by calculation.
| Border pieces | Butted | Mitered |
|---|---|---|
| Side borders (2) | 4½ × 60½ in | 4½ × 72½ in |
| Top and bottom (2) | 4½ × 56½ in | 4½ × 60½ in |
| Total length | 234 in | 266 in |
| Strips across the fabric | 7 strips 4½ in | 7 strips 4½ in |
| Yardage (40 in usable width) | 1 yd | 1 yd |
The math for butted borders
- Sides: cut to the length through the center, 60½ inches.
- Top and bottom: after the side borders are on, the width through the center is 48½ + 4 + 4 = 56½ inches. Measure again after sewing the sides, though, rather than trusting the arithmetic; your seam may differ from the math by a little.
The math for mitered borders
Each mitered strip runs past the corner to make the miter, so it needs the quilt measurement plus twice the finished border width plus a few inches to spare:
strip length = center measurement + (2 × finished border width) + 4 inches
- Sides: 60½ + 8 + 4 = 72½ inches.
- Top and bottom: 48½ + 8 + 4 = 60½ inches.
Strips longer than 40 inches have to be joined. Sew all seven strips end to end into one long strip (a diagonal seam, as for binding, is less visible on prints; a straight seam matches a stripe better), then cut the pieces from it. Seven strips joined make about 277 inches, enough for either version. Six would make only 237½ inches, too tight for butted borders once you square the ends, and too short for mitered.
For a different size, StitchTested's quilt size chart lists standard bed sizes, so you can work out how wide the border needs to be.
Sewing butted borders
- Fold a side border in half and mark the center with a pin. Do the same for the side of the quilt. Fold again and mark the quarters on both.
- Pin the border to the quilt, right sides together, matching the ends and center first, then the quarter marks. Then pin between them every 3 or 4 inches, spreading any fullness in the quilt evenly.
- Sew with a ¼-inch seam, with whichever layer is fuller (usually the quilt) underneath, next to the feed dogs. They ease in the bottom layer slightly.
- Press the seam toward the border. Repeat on the other side.
- Measure the width through the center again, including the side borders, and cut the top and bottom borders to that. Pin and sew them the same way.
Sewing mitered borders
- On the wrong side of the quilt top, mark a dot ¼ inch in from each corner, in both directions.
- Mark the center of each border strip, then mark half the quilt's center measurement on each side of it. For the 60½-inch side, the marks are 30¼ inches each side of center. These marks line up with the quilt's corners.
- Pin the border to the side. Match the centers first, then the end marks to the corners. The strip extends about 6 inches past each corner.
- Sew from dot to dot. Start and stop exactly at the ¼-inch dots, with a backstitch at each end. Don't sew into the seam allowance.
- Sew all four borders this way. Press the seams toward the borders.
- At each corner, fold the quilt diagonally, right sides together, so the two border strips lie exactly on top of each other with their edges aligned.
- Lay a ruler with its 45-degree line along the border's edge and its edge running through the end of the stitching. Draw the line from the stitching to the outer edge of the borders.
- Pin and sew on the line, starting exactly at the end of the earlier stitching and sewing outward.
- Open the corner and check it lies flat and square before trimming the extra to ¼ inch. Press the miter seam open.
For several borders with mitered corners, sew the strips for each side together first, then treat each combined strip as one border. The seams of each border will meet at the miter, so match them with pins before sewing the corner.
Common mistakes and fixes
| Problem | Cause | Fix |
|---|---|---|
| Wavy, rippling borders | Borders cut to the edge measurement, or the strip stretched while sewing | Unpick, cut to the center measurement, pin at quarter marks and ease |
| Quilt edge cupped inward | Border cut too short | Re-measure through the center; a short border pulls the quilt in |
| Miter doesn't lie flat | Stitching went past the ¼-inch dot, or the 45-degree line was drawn off the stitching end | Unpick to the dot and redraw the line from the exact end of the stitching |
| Border seams on the strip show prominently | Seam placed in the middle of a side | Plan the cuts so seams land off-center, or use a diagonal seam |
| Corners aren't square | Top and bottom borders cut too long or too short | Measure after the sides are on; square up before binding |
Borders are the step between finishing the pieced top and basting the layers. Plain border fabric is a good place to show off quilting, whether straight lines or free-motion motifs. Patriotic quilts often use a navy or red border to frame the blocks, as in the patriotic star throw. For the whole sequence, see how to make a quilt.
You might also like
 Quilt border calculatorStrip lengths and yardage for up to five borders, butted or mitered.
 How to bind a quiltDouble-fold binding from cutting strips to mitered corners and an invisible join.
 How to make a quilt from a fabric panelSquaring a pre-printed panel that's off-grain, border math for two common panel sizes, and quilting around the printed picture.
 Mitered bordersThe 45-degree miter in depth, with stripes, several borders mitered as one band, unequal widths and fixes.