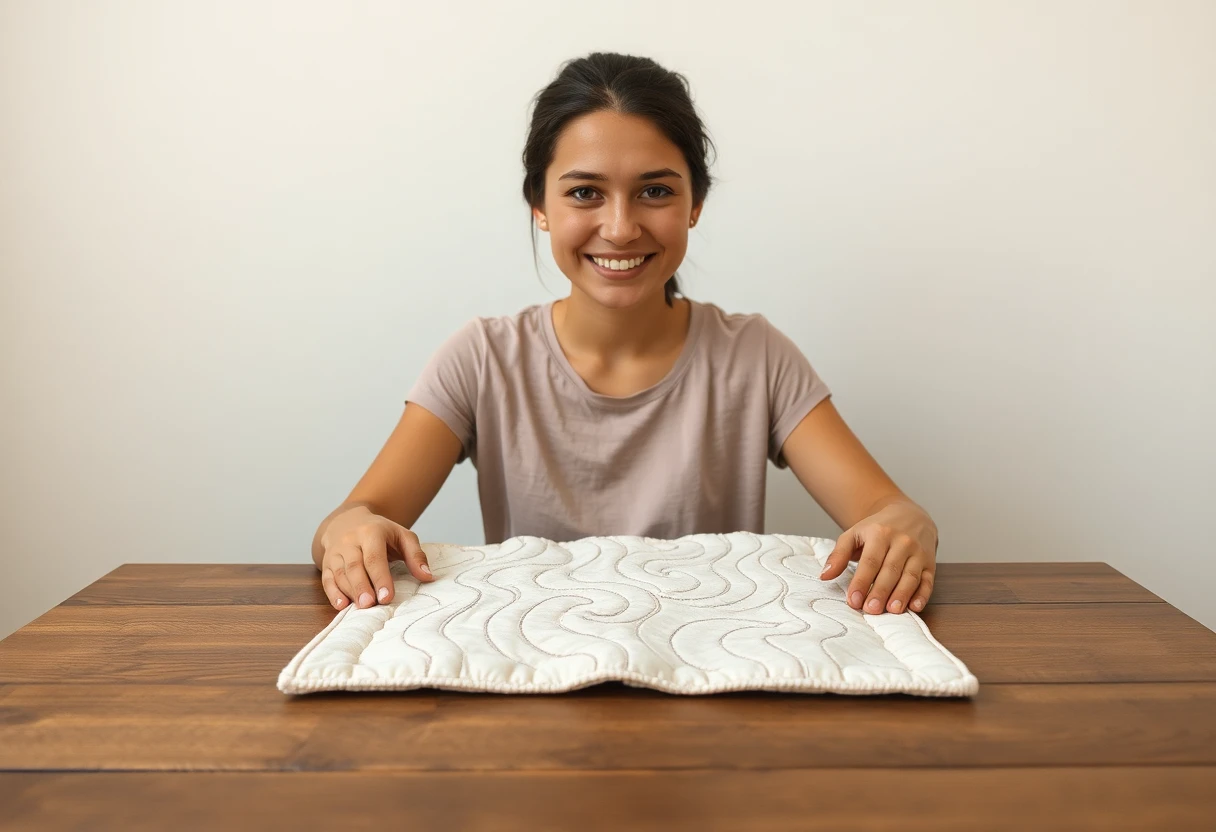
Set up the machine
- Lower the feed dogs. Most machines have a switch or slider, often on the back of the free arm or under the flatbed, marked with a picture of the teeth above and below a line. If yours has no drop feed, the manual may supply a plate that covers the feed dogs. Without either, set the stitch length to 0 so the feed dogs barely move.
- Fit a darning or free-motion foot. It has a spring, or a bar that rests on the needle clamp, so it presses the quilt down only when the needle is down (which stops the fabric from lifting with the needle) and lets it slide freely the rest of the time. Open-toe and clear versions show more of the stitching. A metal open-front darning foot for low-shank machines fits most low-shank snap-on machines, Brother and Janome among them, according to its listing; check the shank type against your manual.
- Put in a new needle. A 90/14 quilting or topstitch needle handles the layers and the sideways forces of free motion.
- Use a slippery surface. A bed extension around the free arm gives the quilt a flat field to slide on.
- Drop the presser foot lever. With a darning foot it's easy to forget, because the foot doesn't seem to touch the fabric, but with the lever up the top tension is released and you'll get a nest of thread underneath.
Some machines have a free-motion or "darning" setting that does several of these at once. The manual will say what it changes.
Make practice sandwiches
Practice on the same materials as the real quilt. Layer two 12-inch squares of quilting cotton with a 12-inch square of the same batting between them. Pin each corner and the center. Plain light fabric on top lets you see the stitches. Make six or eight sandwiches at once; you'll use them up.
Fat quarters (roughly 18 × 22 inches) make bigger practice pieces once you're comfortable, and a few of them, quilted well, can become pot holders or placemats. The mug rug pattern is a good small first project for a free-motion design.
Speed and hand movement
The single idea that makes free motion work: run the machine at a steady, fairly fast speed and move your hands slowly and smoothly. Beginners tend to do the reverse: they sew slowly and jerk the quilt. That gives long, uneven stitches with tiny clumps where they paused.
- If the stitches are long and you can see gaps, your hands are too fast for the needle. Speed the machine up or slow your hands.
- If the stitches are tiny and the thread piles up, your hands are too slow. Move a little faster.
- Aim for stitches about the length of your normal straight stitch, and the same size on curves as on straight runs.
Machines with a speed-limit slider help: set it to about two-thirds and press the foot pedal all the way down, so the speed is constant and only your hands vary.
Place your hands flat on the quilt on either side of the foot, like a frame around the needle, and move the quilt with your whole arms rather than your fingers. Quilting gloves with rubber fingertips grip the fabric so you don't have to press down hard. Stop with the needle down every few inches to reposition your hands, then start again.
Three first motifs
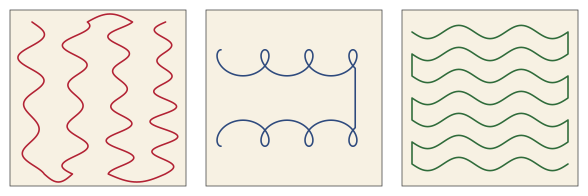
Before stitching, draw each motif on paper with a pencil, without lifting it, ten or twenty times. Your hand learns the path, and you'll find where you tend to paint yourself into a corner.
Meander and stipple
A meander is a continuous wandering line of rounded curves that never crosses itself, like puzzle-piece edges. Stipple is the same thing done smaller and tighter. Rules that keep it looking right:
- Keep the curves round. Points and sharp corners make it look like a jigsaw gone wrong.
- Keep the spacing even, about the width of your fingertip for a beginner meander. Small is harder, not easier.
- Work in a column or a section at a time, heading in one general direction, so you don't get trapped in a corner. If you do get trapped, stitch back along a line you've already sewn, carefully, to get out.
- Don't cross lines. If you cross, carry on; on the finished quilt nobody will find it.
Loops
A row of loops, like cursive letter "e"s or "l"s strung together, is good for borders and sashing. Keep each loop the same size and the crossing point of each loop in the same place. Turning the quilt so you sew toward yourself or away is easier than sewing sideways at first.
Waves
Gentle waves back and forth across the square, each row an inch or so below the last, are the easiest of the three and good for learning to keep a steady pace. They also look good on water-themed quilts and in borders.
Tie-offs and thread tension
Bring the bobbin thread up before you start: take one stitch, pull the top thread to bring a loop of bobbin thread to the surface, and pull it all the way up. Hold both threads for the first few stitches so they don't get pulled into a nest. Take several tiny stitches in place to lock, then begin moving. At the end, do the same, or leave tails and bury them in the batting with a needle.
If dots of bobbin thread show on top, lower the top tension a step. If the top thread lies flat on the back in loops, the top tension is too loose or the presser foot lever is up. Using the same thread on top and in the bobbin makes the tension easier to get right; switch to different colors once that's working.
Common mistakes and fixes
| Problem | Cause | Fix |
|---|---|---|
| Bird's nest of thread under the quilt | Presser foot lever left up | Lower the lever even though the foot hovers |
| Long stitches and gaps on curves | Hands moving faster than the needle | Faster machine speed, slower hands |
| Eyelashes (loops of top thread) on the back at curves | Quilt jerked around a turn, or top tension too loose | Slow down through curves; raise top tension a step |
| Thread breaks often | Old needle or needle too small | New 90/14 needle; check the thread path |
| Puckers in the quilt | Too few basting pins, or spacing uneven across the quilt | Baste more closely; keep the density even over the whole quilt |
Basting matters even more for free motion; see how to baste a quilt (spray basting keeps pins out of the way). If curves aren't for you yet, straight-line quilting with a walking foot finishes a quilt just as well. StitchTested has a separate free-motion guide that covers machines. When the quilting's done, square up the quilt and bind it, or go back to how to make a quilt for the whole process.
You might also like
 How to wash a quiltThe first wash, color catchers, drying, what to do with an old or antique quilt, and safe storage.
 English paper piecingWrap fabric around paper shapes, baste with thread or glue, then stitch the edges together by hand.
 How to sew an accurate quarter-inch seamThe scant quarter inch, a three-strip test that tells you if your seam is right, and how to press it.
 How to baste a quiltBuilding the quilt sandwich and holding it together with pins, spray or thread, with sizes and spacing.