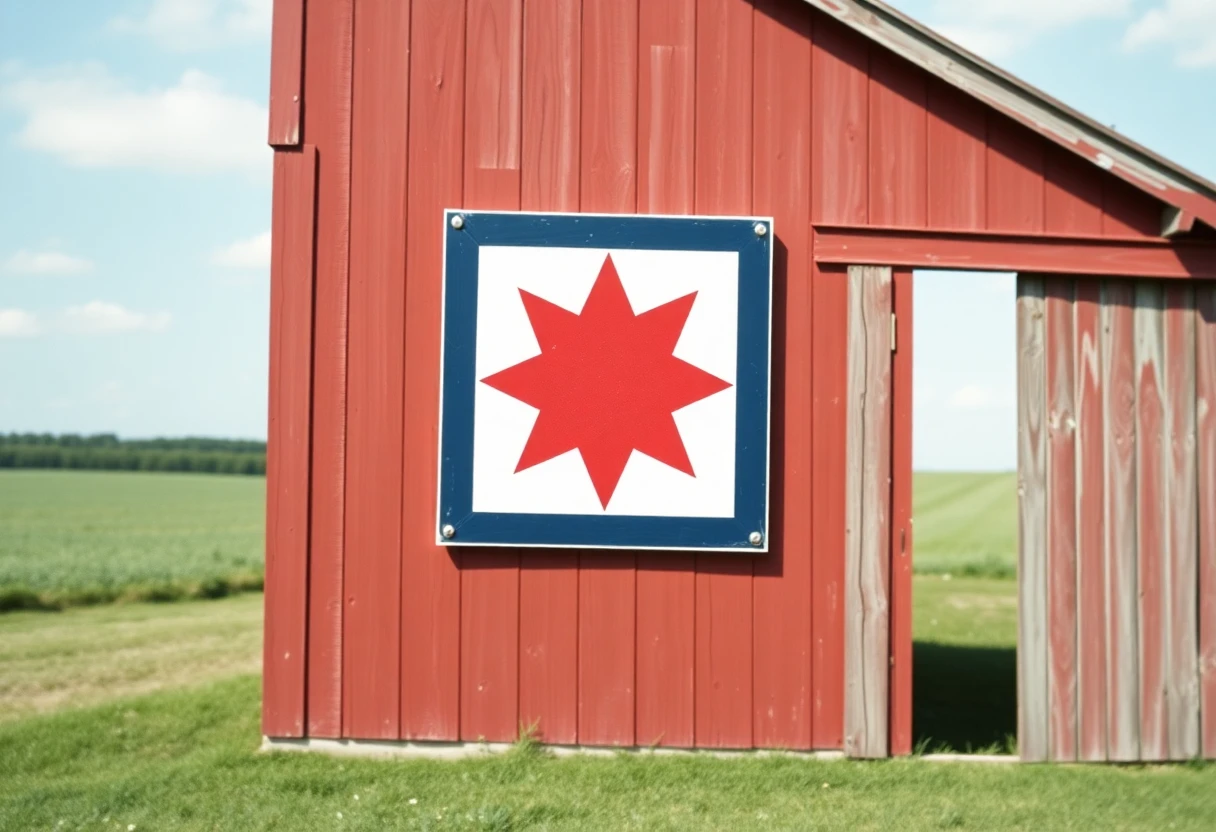
Where barn quilts came from
The modern barn quilt started in Adams County, Ohio. Donna Sue Groves wanted to paint a quilt square on her family's barn to honor her mother, Maxine, a quilter. The Quilt Alliance says Groves and her mother hatched the idea in 1989, and quotes Groves saying the first square was hung in October 2001 at the Lewis Mountain Herb Fair. Ohio Magazine reports that the first Adams County barn quilt was dedicated on October 12, 2001, and that the county's trail grew to "the original 20." Neighboring Brown County soon started its own.
According to barn quilt historian Suzi Parron (quoted in a K-State 4-H barn quilt workshop guide), Groves turned her personal tribute into a "sampler" of squares along a driving trail. The first square on that trail, an Ohio Star, went up at a nearby greenhouse rather than on the Groves barn, which later got a Snail's Trail. The idea spread county by county and state by state into what's now called the American Quilt Trail.
Materials
- A board. MDO (medium density overlay) plywood, an exterior plywood with a smooth resin-paper face, is the common choice; the K-State guide recommends it and says good outdoor plywood with one smooth side also works. Aluminum sign blanks are a lighter option that won't rot, and they need a metal primer. A 4 × 8 foot sheet of plywood cuts into two 4-foot squares; ask the lumberyard to cut it with a sharp blade to avoid splinters.
- Exterior primer.
- Exterior paint. The K-State guide warns that interior paints and colorants fade faster in the sun; ask the paint counter to tint exterior paint. Small sample cans are often enough for a 2-foot board.
- Painter's tape. FrogTape multi-surface tape is made for sharp lines with latex paint; its listing says to pull the tape while the paint is still wet and that it's UV-resistant for up to 7 days in direct sun.
- A long straightedge, a pencil, foam or small flat brushes, and a popsicle stick or old gift card to press the tape edges down.
- Exterior clear coat (optional) and mounting hardware.
Step 1: prime the board
Sand the edges smooth. The K-State guide calls for two coats of exterior primer on the front and the back, with the edges completely covered. The edges are where water gets in, and a board that soaks up water swells and peels. Let the primer dry fully between coats.
Step 2: draw the grid
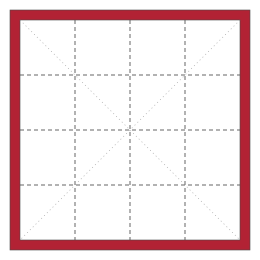
Every pattern here sits on a grid of equal squares. On a 4-foot board (48 inches):
| Grid | Cell on a 4-ft board | Cell on a 2-ft board | Patterns |
|---|---|---|---|
| 2 × 2 | 24 in | 12 in | Pinwheel |
| 3 × 3 | 16 in | 8 in | Ohio Star, nine-patch |
| 4 × 4 | 12 in | 6 in | Sawtooth Star |
| 6 × 6 | 8 in | 4 in | Churn Dash |
- Measure and mark the cell lines along all four edges, then connect them with a straightedge. Draw lightly; paint covers pencil, but a deep groove shows.
- Draw the diagonals the pattern needs, from grid point to grid point.
- Check that the board is square by measuring both diagonals of the whole board. They should match.
- Mark each shape with the first letter of its color so you don't paint the wrong one.
A border frames the design and separates it from the building. The K-State guide points out that a red border on a red barn stops the design from running into the wall. With a 2-inch border on a 4-foot board, the design area is 44 inches, which divides into a 4 × 4 grid of 11-inch cells.
Step 3: tape and paint
- Paint the lightest color first, over the whole area that will be light (often the background). Two coats.
- Once it's dry, tape along the outside of the lines for the next color, so the tape sits on the area that stays light.
- Press the tape edge down firmly with your fingers, then burnish it with the popsicle stick; the K-State guide hands every workshop painter a stick for exactly this.
- Seal the tape edge by brushing a thin coat of the color underneath over it. Any paint that seeps under the tape is then the same color as the background and doesn't show.
- Paint the new color. Saturated colors such as red often need three or more coats; the guide notes that you may need several.
- Pull the tape while the last coat is still wet, pulling back over itself at a low angle.
- Let it dry completely before taping over it for the next color. Work from light to dark.
- Paint the edges and touch up with a small brush. A clear exterior coat adds a little protection if the paint maker says it's compatible.
Shapes that share a point, like the tips of a star, are easiest if you paint alternate shapes first, let them dry, then tape and paint the rest.
Four barn quilt patterns
Each one is drawn on a 4-foot board with its grid shown as dashed lines. Scale them to any size by keeping the same number of cells.
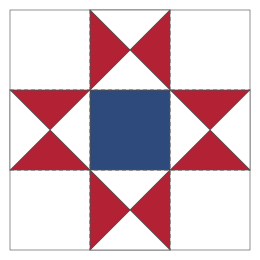

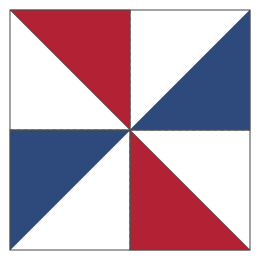
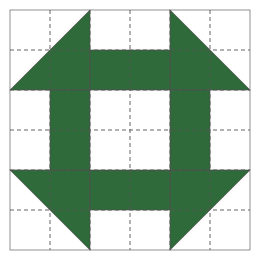
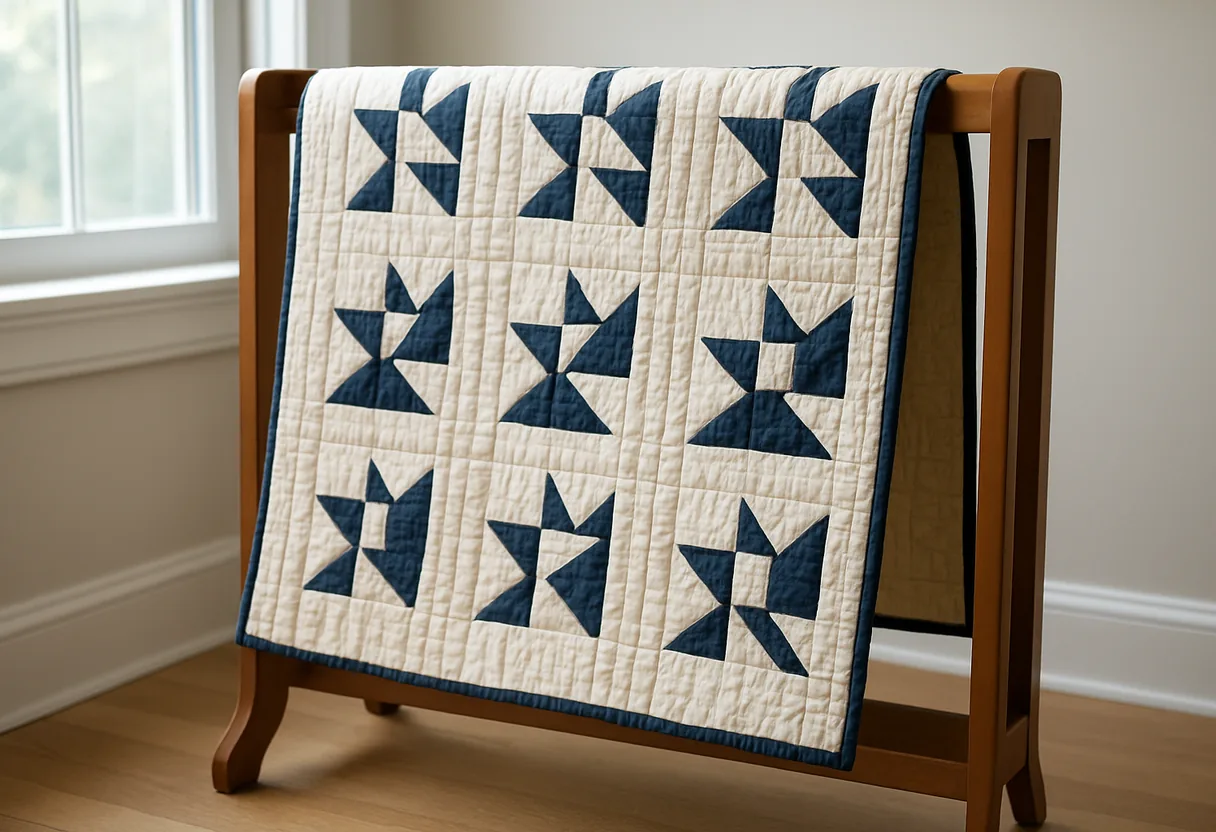
Fabric versions of these blocks are on our block pages: Ohio star and churn dash. Looking at a fabric block is a good way to settle colors before you buy paint.
Step 4: hang it
- Attach a frame of treated 2 × 4s (or 1 × 4s for a small board) to the back with exterior screws from behind, so no screw heads show on the front.
- Fasten the frame to the building with exterior lag screws into studs or framing, not just into siding. A 4-foot plywood board is heavy and catches wind like a sail.
- Hanging a board high on a barn wall is the most dangerous part of the project. Get a helper, and use proper ladders or a lift.
- If you don't want holes in a building, mount the board on two posts set in the ground.
Choosing a design with meaning
Many barn quilts copy a block from a family quilt or carry a color with local meaning. A patriotic star honors a veteran or a family's service, and an Ohio Star on a board connects straight back to the first quilt trail. If a quilt in your family has a story, our quilt ideas page and the memorial quilt guide may help you pick a block. Many counties now keep quilt trail maps; ask your county visitors bureau or extension office whether yours does and how to add a square.
Common problems
| Problem | Fix |
|---|---|
| Paint bleeds under the tape | Burnish the edge and seal it with the underlying color first |
| Tape pulls up dry paint | Wait until the color below is fully dry; pull the tape slowly while the new coat is wet |
| Colors fade within a year or two | Use exterior paint and exterior tints; south-facing walls fade fastest |
| Edges peel or the board swells | Primer missed the edges or back; prime all six sides |
| Star points don't meet | Grid drawn unevenly; measure each cell from the same edge rather than cell to cell |
You might also like
 Where to donate quiltsFour national programs and their current size, fabric and finishing rules, plus how to give to a local hospital, NICU or hospice.
 Sashiko for quiltersThe Japanese running-stitch tradition, four classic patterns, materials, stitching rules and how to use it on quilts.
 15 quilt ideas for your next projectFifteen project ideas, from scrap and signature quilts to charity quilts and mini quilts.
 Friendship star quilt blockA nine-patch star of four half-square triangles, with a plain center for signatures.