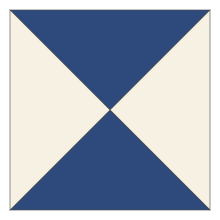
Cut chart
| Finished hourglass | Trim to | Squares, exact | Squares, to trim |
|---|---|---|---|
| 2 in | 2½ in | 3¼ in | 3½ in |
| 3 in | 3½ in | 4¼ in | 4½ in |
| 4 in | 4½ in | 5¼ in | 5½ in |
| 5 in | 5½ in | 6¼ in | 6½ in |
| 6 in | 6½ in | 7¼ in | 7½ in |
The rule: finished size plus 1¼ inches for the exact size, plus 1½ inches if you want to trim. For both methods below, one square of each color makes two hourglasses. Every size here was checked by calculation.
Why 1¼ and not the ⅞ inch used for half-square triangles? A QST has seams on both diagonals, and each one takes up seam allowance across the corner, so the starting square has to be bigger.
Method 1: from two half-square triangles
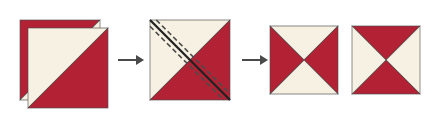
- Cut one square of each fabric at the size in the chart.
- Draw a diagonal on the lighter square. Place the squares right sides together, sew ¼ inch from the line on both sides and cut on the line. You have two HSTs. Don't trim them.
- Press both seams toward the darker fabric.
- Lay one HST on the other, right sides together, with the dark half facing the light half. The seams line up and nest because they're pressed in opposite directions. Pin right at the seam.
- Draw a diagonal on the top HST, crossing its seam at a right angle.
- Sew ¼ inch from the line on both sides. Cut on the line.
- Press the new seam open. Four points meet in the middle, and an open seam is much flatter there.
- Trim (see below).
Use this method unless you have a reason not to. Every outer edge is on the straight grain, and you never handle a cut triangle on its own.
Method 2: quarter-cut triangles
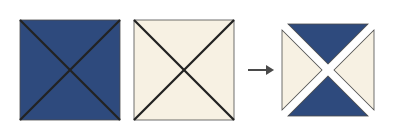
- Cut one square of each fabric at the exact size from the chart.
- Cut each square on both diagonals. You get four triangles of each fabric, with the long edge of each on the straight grain.
- Sew a navy triangle to a cream triangle along one short side, with the navy on top. Repeat so you have four pairs, all sewn the same way.
- Press toward the navy.
- Sew two pairs together along the long diagonal, matching the center seams so they nest. Press open.
The short sides you sew are bias edges, so handle them gently and don't press with a sliding iron. What you get in return is control over color. Every triangle is cut separately, so one hourglass can have four different fabrics, or you can mix triangles from a whole stack of scraps.
Trimming an hourglass
Put the 45-degree line of a square ruler on one diagonal seam, and the halfway marks of the unfinished size on the point where the seams cross. For a 3½-inch unit that's the 1¾-inch lines in both directions. Trim the two sides along the ruler's edges, turn the unit and repeat. Both seams should run exactly into the corners, with the crossing at the dead center. Check this before trimming the second pair of sides; if the center is off, it can be split between the sides rather than all taken from one.
Making a batch
For the 120 units in the quilt below (4 inches finished, Method 1), cut 60 squares of print and 60 of cream at 5½ inches. A 5½-inch strip cut across the width of fabric gives seven squares, counting on 40 usable inches, so the cream takes nine strips: 49½ inches, or about 1½ yards with a little to spare. The prints can come from scraps, since each pair of print and cream squares makes two matching units.
Work in stages: draw lines on all the cream squares, chain-piece every pair down one side of the line and then the other, cut, press, and only then pair the HSTs for the second seam. Pairing HSTs from two different pairs gives units with two different prints and the cream, a quick way to make the quilt look scrappier.
Common mistakes and fixes
- Same colors side by side instead of opposite, so the unit looks like a half-square triangle with an extra seam. In Method 1, the HSTs were stacked with matching colors facing. Put dark against light.
- Center doesn't meet in a crisp point. The HST seams didn't nest. Press them in opposite directions and pin at the seam.
- Unit too small to trim. Exact-size squares and a slightly wide seam. Use the "to trim" column.
- Points blunted in the quilt. The unit was trimmed off center, so the seam doesn't reach the corners. Center the crossing before you cut.
- Stretched edges in Method 2. Bias edges handled roughly. Starch the fabric before cutting.
Quilts made from hourglass blocks
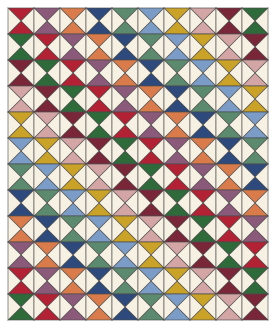
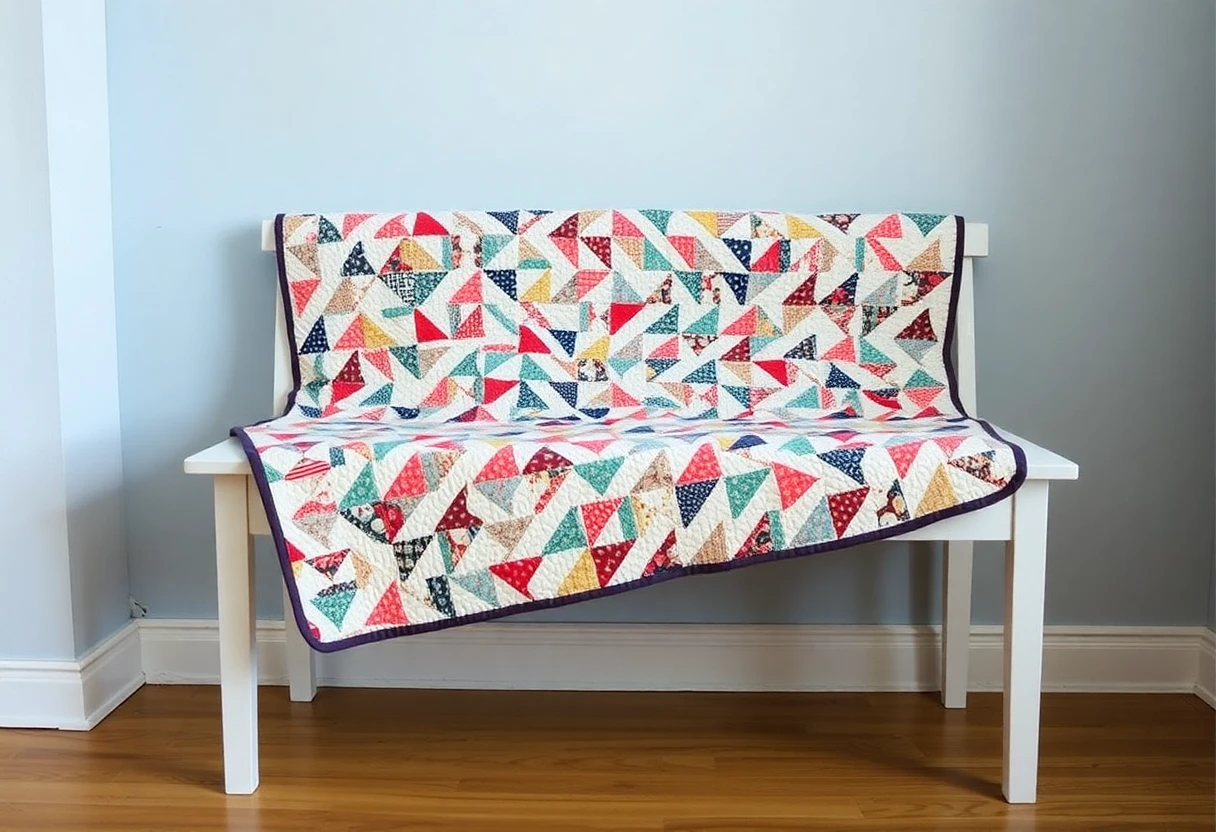
All turned the same way, hourglasses form rows of background diamonds with the print triangles stacked between them, as in the diagram. Two hourglasses and two plain squares make a four-patch; four hourglasses around a center make the points of a star.
It's a good scrap project in red, white and blue, too. Keep the cream triangles constant and any mix of patriotic prints reads as one quilt. For a bigger patriotic project, the patriotic star throw has the full pattern. The units on this page also lead into the flying geese and bow tie guides.
You might also like
 How to make half-square trianglesThe 2-, 4- and 8-at-a-time methods, a cut-size chart for each and how to trim.
 Ohio star quilt blockAn eight-point star from quarter-square triangles, cut for 6, 9 and 12 inch blocks.
 Economy quilt block (square in a square)A center square framed by two rounds of triangles, with cut sizes for 4, 6, 8 and 12 inch blocks.
 Churn dash quilt blockHalf-square triangle corners and two-strip bars, cut for 6, 9 and 12 inch blocks.